Mastering Zebra Art: A Step-by-Step Drawing Guide
Ever marveled at the intricate patterns and striking black and white stripes of a zebra, wondering how to recreate this captivating animal on paper? Drawing a zebra can be a fun and rewarding artistic challenge. Here's a step-by-step guide to help you capture the essence of these exotic creatures.
A zebra's stripes are the key to creating a dramatic and eye-catching drawing. By the end of this guide, you'll be able to draw a realistic-looking zebra suitable for a wildlife scene or a standalone portrait. Let's dive in and learn how to draw a zebra through these simple and engaging steps.
The Basic Structure
The first step in learning how to draw a zebra is understanding the animal's basic structure. A zebra has a horse-like body, with a long neck, a small head, and a short tail. Its legs are sturdy, and its coat is covered in stripes. Begin by sketching a simple horse or donkey-shaped body, adding a small head, and a stubby tail.


Once you have the basic form, you can start adding details and refining the shape. Notice how the zebra's body tapers around the shoulders and widens slightly around the hips. Also, pay attention to the positioning of its legs - zebras' hind legs are slightly longer than their forelimbs, giving them a unique stance.
Sketching the Striped Coat
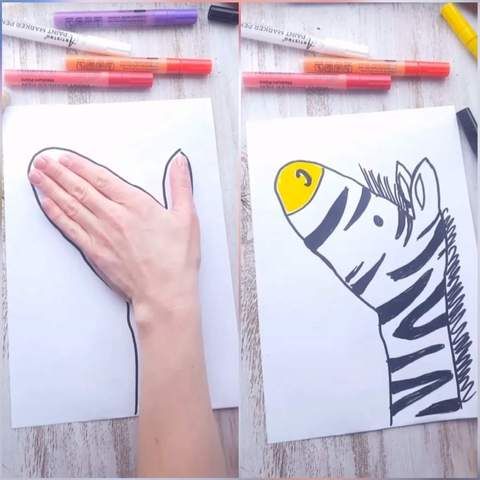
When learning how to draw a zebra, knowing how to draw the stripes is crucial. Zebras have three types of stripes: vertical stripes on the neck and head, horizontal stripes on the body, and a unique striping pattern on the legs. Start by sketching the vertical stripes on the zebra's neck and head, using light, curved lines. Don't worry about drawing the stripes perfectly just yet - this is a preliminary sketch.
Next, draw the horizontal stripes on the zebra's body. These stripes aren't perfect straight lines; they curve and undulate, following the shape of the zebra's body. Sketch these stripes using light, flowing lines, being mindful of the patterns on the legs later on.
Refining the Stripe Patterns
Now it's time to refine your stripe patterns. Start with the zebra's head and neck, adding more detail to the vertical stripes. Notice how the stripes are wider at the top of the head and taper towards the bottom, sometimes disappearing altogether. Be sure to maintain the contrast between black and white stripes for the most impact.


Move on to the zebra's body, refining the horizontal stripes. As mentioned earlier, these stripes curve and undulate, following the zebra's form. Be sure to have some variation in the stripe widths - some zebras have wider stripes, while others have thinner, more closely packed stripes.
Adding Details and Shading
With the basic stripe patterns in place, you can now begin adding more details to your zebra drawing. Start by drawing the zebra's legs, following the unique striping patterns found there. Remember, the stripes on the legs are often oblique, following the angle of the legs.
Next, add the distinctive "shadow" stripes. These stripes are lighter in color and located where two darker stripes intersect, creating a subtle, diagonal pattern. Be sure to include these shadow stripes for an authentic zebra look.


Shading for Dimension
Even though zebras are black and white, you can still create depth and dimension through shading. Start by lightly shading the zebra's mane, back, and hindquarters, using a soft pressure with your dark pencil. Focus on the areas where the light wouldn't hit - the shaded areas will help define the zebra's body.
To create the illusion of rounded forms, blend your shading by gently rubbing the pencil marks with your finger or a blender. This will create a smooth, subtle gradation of tones, adding depth and dimension to your zebra drawing.
Refining the zebra's Head and Face
Finally, give your zebra a well-defined head and face. Sketch the eye, ear, and nostril details, being careful to maintain the intricate stripe patterns. Don't forget to include the faint, light-colored stripes on the zebra's muzzle.


Once you're satisfied with your zebra drawing, carefully darken the black areas and lighten the white areas using your eraser for a more pronounced contrast. This will help your zebra stand out and add a dramatic touch to your artwork.
Drawing a zebra can be an enjoyable and rewarding experience. With a bit of practice, patience, and a good understanding of the animal's unique stripes, you'll be able to create impressive zebra drawings that capture the essence of these captivating creatures. Happy drawing!
Related Articles

Mastering Thanksgiving Feast Drawing: A Step-by-Step Guide
The turn of the year brings with it a plethora of exciting festivities, none more heartwarming than Thanksgiving. This cherished tradition not only ushers in...

Mastering the Question Mark: A Step-by-Step Drawing Guide
Mastering the art of drawing can be a rewarding experience, and knowing how to draw a question mark can open up a world of communication and creativity. As one...

"Mastering Barbie Bulldog Drawing: Step-by-Step Guide"
Draw a bubbly Barbie Bulldog in just a few steps with this fun and easy guide! Whether you're an experienced artist or a beginner looking to add some puppy...

Mastering Pet Portraits: Step-by-Step Guide to Drawing a Dog's Open Mouth
Drawing a dog's open mouth might seem challenging at first, but with the right techniques and a bit of practice, you can capture the expressiveness of your...

Mastering Puppy Portraits: A Step-by-Step Guide to Drawing Baby Dogs
Nurturing your inner artist and capturing the essence of innocent puppy energy in a drawing is a delightful challenge. With a bit of patience and the right...

Mastering Realism: Step-by-Step Guide to Drawing a Stapler
Ever found yourself in need of drawing a stapler but struggling to capture its likeness? Fret not! With a bit of patient observation and step-by-step guidance...